Friday, November 20, 2015

Putting the Garden to Bed

This fall has been pretty warm. In fact, this October was the warmest on record. So, many of your gardens may still be going strong. Though as I write this it is 62 degrees outside, the temperatures will soon fall. This weekend the lows at night will start to hit the 30s. This signals it is time to start  putting the garden to bed. Thoroughly cleaning up the garden and readying it for winter is important for a healthy spring garden. Here are some things you

Mulch 
If you have planted fall plants or bulbs, you probably have already mulched(or should have). If you haven’t, now is the time. Adding a nice layer of mulch to your garden gives extra protection to your plants. It also adds nutrients to the soil as it breaks down over time. Be sure to choose natural mulch and not that funky dyed mulch that’s full of chemicals that you don’t need to be putting in your garden or the water supply. Check out Better Home and Garden for the best types of mulch.


Blow out irrigation systems
If you have an irrigation system, you probably don’t want it to freeze and crack over the winter. To prevent this, you want to get out all of the water. To do this you can use an air compressor to blow it out. The pressure you use depends on the type of irrigation system you have (a maximum of 80 psi for rigid PVC pipe systems, or 50 psi for flexible black polyethylene pipe). If you have a timer on your hose, disconnect this and bring it inside.
If you don’t have an irrigation system, you still want to keep your hoses from freezing. Make sure to get all the water out before putting them away.

Clear and compost dead plants
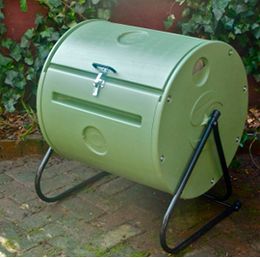
The point of clearing away dead plants is to keep the garden clean. Leaving dead plant debris in the garden can cause the spread of disease and give insects a great place to breed. If the plant has died because of what looks like disease, do not compost this. Never put diseased plant material in the compost. But definitely compost all other plant materials. I know you have plenty of leaves by now for it. A nice hot compost pile will kill off the pathogens and convert the garden debris to a usable fertilizer in the future, so don’t throw all that debris away!

Cut back perennials
After a few frosts, cut back perennials to about 3-6 inches. If they are still green and are going strong, leave them be until they start to wither. The plant gets it’s energy from the sun through it’s leaves. As long as the leaves are green, they are collecting and storing energy. They need as much as they can gather to get through winter. Your plants most likely will not all turn at the same time, so this will be an ongoing process.
Some perennials are super cold tolerant and won’t need to be cut back. You can also leave stems with attractive seed heads for winter interest and to feed wildlife.
Ornamental grasses, though they change color, still look great throughout the winter. These can be left and then cut back in late March.

Clean out and store small pots
Small pots left outside during the winter months have a high risk of cracking and breaking as they freeze and thaw(especially terra cotta). Unless you can bring these potted plants inside, it’s best to empty them and wash them out for next year. Washing out your pots is important for not spreading disease. While you’re at it, you might as well give all your garden tools a nice scrub down so everything is nice and fresh in the spring. This is also a great time to organize all your tools. Your future self will thank you. (:

Friday, November 13, 2015

Cold Season Wellness With Herbs and Spices

As we move into the dark, cold months it is important that we care for our bodies. The sun goes away pretty much right after she shows her face. Temperatures fluctuate for a while and then plummet. Cold and flu season sniffles begin. The stress of the holidays wears on our bodies. Thankfully, nature has provided us with many plants that can help us stay well through the cold season. 


Echinacea for immune support


That beautiful native perennial that we enjoy seeing in the warm months, can help us get through the cold ones. Echinacea is said to be an immune-enhancing herb which helps prevent colds and/or shortens the length of them. It is endemic to eastern and central North America and was used for hundreds of years by Native Americans before European colonizers arrived here. 

Echinacea contains phenols which have high antioxidant properties. “Echinacea also contains alkylamides or alkamides, (not in E. pallida), which have an effect on the immune system”. (Medical News Today)

It can be found in the form of herbal extracts, teas, dried herbs, or capsules. Check out this DIY recipe for an echinacea tincture. 


Elderberry/ Sambucus for cold and flu

Dana making elderberry wine a few years ago
Elderberry has been traditionally used on the skin to treat wounds and taken by mouth to treat respiratory illnesses such as cold and flu. An article put out by the University of Maryland’s Health Center states, “Some evidence suggests that chemicals in elder flower and berries may help reduce swelling in mucous membranes, such as the sinuses, and help relieve nasal congestion. Elder may have anti-inflammatory, antiviral, and anticancer properties”. Elderberry is typically available in liquid or syrup form. Check out this DIY recipe for an elderberry syrup. It can also be found as a capsule and lozenge.


Peppermint and Eucalyptus for sinus relief


The oils of these plants are great nasal decongestants. “Each herb contains compounds that relax the airways and open congested sinuses and nasal passages”. (Mother Earth News) 
I like using these in combination with steam when i’m stuffed up. I can see myself a few years ago when I was super sick and could not breathe out of my nose at all- head under a towel with a steaming bowl of water and drops of Eucalyptus in my lap. It was a sad sight but, it helped. I have also just put drops on the floor of my shower when I’m in there for some extra steam help.


Turmeric and Ginger for aches and pains


You’re cold, frigid and all bunched up tight to keep warm. This tension can make our joints feel  sore and cause achy all over. Turmeric and ginger are in the same family and have powerful anti-inflammatory properties. 
“A recent study from the Journal of Alternative & Complementary Medicine found that a daily dose of 2 gm of curcumin(a compound found in turmeric) to people suffering from osteoarthritis resulted in reports of reduced pain and increased mobility. In addition to soothing sore joints, curcumin is a potent antioxidant, brain health supporter, and strengthener of the vascular system by improving the lining of the blood vessels”. 
Ginger is said to also act as an expectorant and has a warming effect that may help if you’re chilled. Both can be added to dishes raw or made into tea. 


Lemon Balm and Chamomile to unwind


To ease the seasons stresses, it is nice to unwind with a nice warm calming tea. Lemon Balm and Chamomile have both been traditionally used for their calming properties. Lemon Balm “was used as far back as the Middle Ages to reduce stress and anxiety, promote sleep, improve appetite, and ease pain and discomfort from indigestion”. (University of Maryland Health Center) Chamomile is reported to have similar results. They are both commonly found as teas but can also be found as tinctures, extracts, oils and capsules. 


There are many things you can do to incorporate these herbs and spices into your diet over the next few months. When doing it yourself, make sure you research the herb you are using thoroughly before foraging and making your own teas and tinctures. While there are parts of the plant that can be medicinal, other parts of the same plant may be poisonous and it is best to do your research before using the plant yourself. If you're not into growing your own to use or foraging, buying from stores is the next best option and takes away a lot of the guess work. Both are great options! Just make sure to do your homework and find what is best for you. 


Sources:
https://umm.edu/health/medical/altmed/herb/elderberry

http://www.medicalnewstoday.com/articles/252684.php

http://www.motherearthliving.com/health-and-wellness/cold-busters.aspx?PageId=1

https://umm.edu/health/medical/altmed/herb/lemon-balm

http://amazingwellnessmag.com/cold-weather-herb-guide/

http://www.webmd.com/vitamins-and-supplements/lifestyle-guide-11/supplement-guide-chamomile


Saturday, November 7, 2015

DIY Forced Bulbs For Winter Blooms

We have already covered that it’s time to get your bulbs in the ground outside for spring blooms, but maybe you’re like me and are impatient. Spring is pretty far off and it would be great to be able to enjoy some blooms in the winter. Well, there is a way! You can force bulbs to bloom in the winter indoors. You just have to trick them a bit.


All you need are pots, some Amaryllis bulbs(or other warm loving bulbs, paperwhites are another great indoor option), and potting mix. The pot you use for your bulb should not be much larger than the bulb itself, unless you want to plant a bunch in on container.


Directions
1. Choose a plump bulb that has some roots at the base and a pot that is just large enough for bulb (or bulbs) — the bulb needs to feel crowded to bloom.

2. Partially fill the pot with potting mix, then position the bulb so that the top third is exposed after
you add more potting soil. Water thoroughly and make sure the water drains from the pot.


3.  Place the pot in bright light and keep the soil moist but not wet. Water only when the top inch
or two of the potting mix is dry to the touch. Over watering at the beginning of the growth cycle
is the main cause of failure.

Tips
The bulb should be kept at room temperature, above 60 degrees Fahrenheit. The warmer the temperature (70 to 80 degrees is ideal), the faster the bulb will sprout and grow. Watering with warm water or providing bottom heat (by setting the pot on a propagation mat or on the top of a refrigerator or warm appliance) may help stimulate growth. Amaryllis plants are tropical so they like the warmth.


Within two to eight weeks, a thick flower stalk should shoot up. Flat leaves will follow as the flower stalk grows. Some varieties of Amaryllis take more time to sprout than others, so be patient. Check to make sure that the bulb has remained firm, and do not overwater.

Rotate the pot slightly every few days so that the flower stalk receives consistent exposure on all sides and thus grows straight. Move the plant out of direct sunlight when the flower buds begin to show color.


Having a bunch of these beauties can really be a ray of sunshine in the dark winter months. They also make great gifts for that holiday that I shall not name yet.