Thursday, December 31, 2015

History of New Year's and It's Connection to Nature

In ancient history, the date of the first of the New Year has changed from culture to culture as they each developed their own calendars of the year. Many had to do with astrological events or change in season, which affected their livelihood; the crops. When humans had a solid connection to the Earth they celebrated the bounty which it provided.

Akitu and New Year's Eve
For some the New Year was celebrated in the springtime. The earliest celebration dates back to 4000 years ago in Babylon with a festival called Akitu, the Sumerian word for Barley, which was cut in the spring. It fell in March during the first full moon after the vernal equinox, which marks the first day of spring.


Around 3000 years ago, the Chinese New Year originated to celebrate the start of the spring planting season. Later it became entwined with folklore and myths. Today, the “Chinese New Year is still based on a lunar calendar that dates back to the second millennium BC, the holiday typically falls in late January or early February on the second new moon after the winter solstice”.

Viking Fire Ball

In Scotland, local traditions based around fire date back to pagan winter celebrations. Fire represents the return of the sun to the land.


In the US, we use the gregorian calendar and celebrate the first of January as the start of the New Year. The Gregorian calendar is a later version of the Roman calendar, with just 10 months, which used to follow lunar cycles. They celebrated the New Year during the vernal equinox in March. This 10 month calendar fell out of sync with the sun and two more months were added. January 1 became the start of the year.


The tradition of setting New Year's resolutions dates back to ancient times as well. Babylonians made promises to their gods to repay debts. Today, we reflect on the past year and think of how to better ourselves in the future. 
Hopefully, many resolve to, in some way, reconnect with our planet Earth, to which we owe our lives.

Source History.com

Friday, December 18, 2015

It's Wreath Making Time!

Making your own holiday wreath is easy, fun and you get to make it however you want!
First, go gather some plant materials! Be creative. There are a lot of dried plants out there that make great decorations for your wreaths.


Wreath making supplies
Floral wire
Wire frame
Pruners or heavy duty scissors
Evergreen branches
And other fun plant materials you found

Snip pieces from your evergreen branches so you have small bundles. Use the floral wire to attach the bundles around the frame. You repeat this overlapping the previous bundle.

I made many with the wire frame last year so I wanted to try a different wreath. I made this one with vines from the woods. You don't need the frame for this because you can just wrap them in on themselves. 

You can decorate the vine wreaths the same way by attaching bundles and other decorations. 


Ta- Da
Now we are all pros.

Friday, December 11, 2015

Soil and Compost

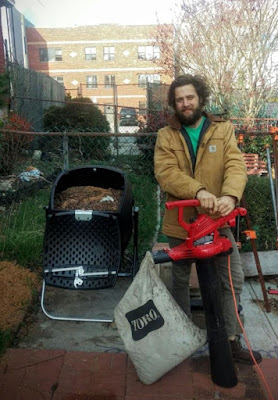
Colin and our sweet new composter!
Since the Staghorn team has gotten a new composter, I figured now is a good time to do a post about soil and compost. Composting is finally taking off and more and more people are doing it or at least have heard about it. NYC has been expanding their compost program with the brown bins for compost curbside pick up, which is super awesome. But right now it’s only happening in certain areas. There are other options for getting rid of your kitchen scraps. Most of the farmers markets have compost collections. If you are lucky enough to have some space for a bin then it’s good to know a little about composting so you can get it right.


If you have a garden, composting is the best thing you can do. It all starts with the soil. If the soil isn’t right, your garden is not going to do well. Feeding the soil will keep your plants happy and growing strong.
Let’s start with the basics..


What is soil?


Soil is the mixture of eroded rocks and minerals, organic matter, liquids, and myriad organisms that together support plant life.


Sand, silt and clay are the main non-living rock particles that soil is composed of.


Textures of soil are determined by the ratio of sand, silt and clay that they contain.
Different plants thrive in different types of soil. Think sandy beach plants (sandy soil) vs forest understory (high organic matter, more clay in soil). For a nice garden soil you wouldn’t want either extreme, sand or clay, but a good mix. Loam is a good mix of clay, sand and silt, which is best for garden soil.


The composition of the soil is important as well. You don’t want super compacted dry soil.

Ideal Soil Composition for Gardens:
  • Air 25%
  • Water 25%
  • Organic matter 5%:
    • Organisms 10%
    • Roots 10%
    • Humus(fully broken down organic matter) 80%


What is compost?


Compost is organic matter that has been decomposed and recycled to be used as a fertilizer and soil amendment. It is an organic way of turning your kitchen and yard waste into rich nutrients for your garden soil.


There are three main elements to creating successful compost. These include:


Air – Turning your compost helps give the microorganisms needed oxygen. This helps the decomposition occur faster and helps prevent unpleasant odors that may occur if the pile begins to compost anaerobically.


Moisture- The pile should be damp but not soggy. If it is too soggy, more browns should be added.


Temperature- Compost should be warm to the touch. The heat in the pile is caused by biological processes. Having the pile warm enough is important for killing pathogenic organisms and possible weed seeds.

Finished compost piles can take a few months to a year to fully break down.
The compost is ready to use when it is dark brown, smells like earth, and crumbles in your hand.


What should and shouldn’t go into your compost:


Good compost is a mix of 3 parts “browns” and 1 part “greens”. Here are some examples of each:


BROWNS, Carbon-rich


+Dry Leaves +Dead Plants
+Shredded Paper +Pine Needles
+Sawdust +Straw


GREENS, Nitrogen-rich


+Grass Clippings +Green Weeds
+Fruit & Veg Scraps +Garden Waste
+Eggshells +Coffee Grounds


DO NOT ADD TO COMPOST:


-Meats and bones -Fish -Dairy
-Nuts -Fats & Oils -Eggs -Pet Waste

If you are composting through the NYC compost program they say you can compost these things I have listed not to. This is because they have a system which is much stronger than any backyard bin you will have. A system must reach extremely high temperature to be able to process these things. Also, you really don’t want rotting meat in your backyard.

Saturday, December 5, 2015

How to Propagate Succulents From Cuttings or Leaves


I just spent the last week in sunny Southern California. One of my favorite things about SoCal is that succulents are growing everywhere! I love succulents. If I could I would have a giant wall covered in them... one day! Back on the east coast succulents growing outdoors are far less abundant, though there are varieties that are hardy even over here. To cope with this, it is fun to grow them indoors. I love them so much that most flat surfaces in my room are covered with them(maybe too much?). 


Awesome window box near Santa Monica

Part of the awesomeness of succulents is that they are so easy to grow and propagate. You can take a little piece of one, or even a leaf, and start a whole new plant. Here is a little guide to starting new plants from pieces of others:

Taking a cutting

How to take a cutting depends on the type of succulent. Most can be propagated from just a single leaf and others need to be cut with part of the stem and some can be done either way. Aeoniums are a type that only work with a cutting. Sedums and echeverias can be done by a leaf or cutting.


This is a type of Aeonium


This is a echeveria with little sedums around it
When you are taking a leaf cutting, it is important you get the entire leaf. If part breaks off then it will most likely not work. 

When taking a cutting from a stem with leaves, cut the stem and then remove the lower few rows of leaves. Where the leaves were is where new roots will grow. 

I found a broken piece on the ground! Score!

What to do with your cutting


With a cutting of a stem, you need to leave it be for about a week so that the area that was cut can scab over. 

You can either lay your pieces out on some surface, a bowl, windowsill, dresser, or lay them out on top of some soil. 

Pieces on my dresser
Laid out on top of soil
Either way works fine. As you can see there are some with roots on my dresser and on the soil. Those on the soil are older and some have started to grow new leaves.

Here is a close up of the new leaves
Watering

Mature succulents require very little water but the new cuttings need a bit more. I use a spray bottle to water mine. I do this a few times a week. It's important not to soak them too much as they can rot. 
Some people water the soil and let the roots take what they need but I get scared of overwatering them that way. Also, these plants are very resilient. I've had ones fall behind the table and keep growing without being watered at all. 

Not all of your leaves will grow new plants. Sometimes they grow roots and no new leaves. Sometimes they just shrivel up. And sometimes they work!

New Plants

Once your leaves start growing new leaves, the old starter leaf may shrivel up. You can see that in the close up photo above. You can remove this old leaf if you want. I tend to leave it because they are so fragile and I hate to break the new plant after I've gotten this far. 

You can put this new plant in a little pot or leave them all growing together in the larger one.

Here are a bunch of broken pieces I put in a pot to grow together


Your larger cuttings can be put into a pot when they start growing roots.


This is a large jade cutting that I potted in a glass jar. If you do this, water very sparingly because there are no drainage holes.

Sometimes if one of your plants is getting too tall and leggy, it's nice to cut that long piece off, start and new one. The place where you cut from the original plant with now grow fuller where it was cut.

On the left side of this jade plant was where I cut a piece and now two stems are growing from that spot
Have fun with your cuttings and new plants!

An awesome dinosaur succulent planter my friend's mom made for me!