Friday, February 19, 2016

5 Awesome Tropical Plants


How could I come all the way to Mexico and not do a post about some of the amazing tropical plants all around me? The abundance of useful plant life around is crazy. Yes, all plants are 'useful' in that they give us air to breathe and are inherently beautiful but the usefulness of the plants here goes beyond that. Everywhere you look there is food or medicine growing all around you. I find myself walking the streets staring up at the trees looking for what they have to offer. Some of the trees I saw on my way to the store this morning include: mango, lime, tamarind, noni, neem and of course coconut(and those are just the edible ones I took note of). There is just something really special about being able to look out the window and seeing a tree COVERED in mangoes. From where I am sitting now, I can see just that(along with all the coconuts you could ever want).


I picked five awesome tropical plants to highlight here for you. Enjoy (:

Agave
Agave tequilana, Blue Agave
Colin with the giant Blue Agave
Agave americana 'Marginata' 
The agave plants here can get so massive! They can live from 10-30 years and grow 10ft wide. Towards the end of an agave's life, it'll shoot up a flower stalk that can reach up to 26ft tall. As most of the plants here are very useful, this one is where tequila comes from. Well, tequila only comes from Blue Agave, but you can make mezcal from other types of agave. (Tequila is a type of mezcal- you can learn all about the differences here.) The leaves of the agave plant also contain a fiber that can be used for rope making and a special form of leather embroidery called Piteado.

Bay Leaf Palm
Sabal mauritiiformis


These bright green palms were everywhere around the ruins of Muyil. It was so cool to be walking through the dark jungle and see the sun shining on these big leaves, like big greens suns throughout the forest. The Mayans, and many still today, used these leaves for thatching roofs. (Learn more about Mayan roofing here)  Below is a photo I took of a thatched roof in Tulum. The leafs can also be used to make baskets and other crafts.


Nopal


I tried nopal for my first time on this trip. I had eaten the prickly pear fruit before but I didn't know you could eat the paddy as well. Some other names for the nopal cactus are opuntia, nopalli, prickly pear, cactus pear fruit, nopol, tuna cardona or “tuna”, and westwood-pea. Nopal was a warrior food for the Aztecs. It was believed to give courage and resolution. It is now found that it has antioxidant and cholesterol-lowering properties. Check out this site to learn lots about nopal's health benefits, along with some recipes.  

Ficus Tree
Ficus growing on the Muyil ruins
In Sian Ka'an Biosphere Reserve


Monkey climbing at the Muyil ruins
Dana on the ficus growing on the Muyil ruins
Roots growing into the Tulum ruins
Ficus trees are some of my favorite magical jungle trees. I mean.. look at them. They can send roots down from their branches and plant themselves all around them, growing huge. This feature was incorporated into Mayan building techniques. They "employed Ficus trees planted around their pyramids, so that its hanging roots would provide for an tight external framing that together with the cement would render the buildings resistant to the ever present hurricanes of the region."(source) In the photos above you can see that some are a bit too close to the pyramids (on them!), and will eventually destroy the buildings. But, so it goes, the jungle will take back what belongs to it. 


Coconut Tree


I couldn't not mention the coconut tree. You can't go outside without seeing these everywhere. From where I am sitting, I can count 16. Americans are in recent years finally discovering all the uses of the coconut tree. There are a zillion websites claiming a zillion benefits and uses of coconut oil(here's a list of 107 uses..random number). Ooo and the miraculous hydration powers of coconut water(peace out hangover). I unfortunately had food poisoning yesterday and was in great need of re-hydrating. Today I took full advantage of these awesome trees. Laying under an umbrella with a fresh coconut watching the ocean... it was a pretty nice way to recover.  


I could go on and on about all the awesome tropical plants here. I love them so much! Maybe I'll have to do another post about some more later. For now, enjoy these. 


Showing my love <3

Friday, February 12, 2016

Before & After: Windsor Terrace


It's time for another 'before & after' post from one of our awesome gardens from last summer. We are getting pumped about the coming season and looking at our past projects instead of thinking about the cold is way more fun. 
(Cold? What cold? Sorry, I'm still in sunny Mexico but I heard it's pretty freezing back home. Sorry guys, don't mean to rub it in.. :D )

Anyway, this is a wonderful backyard garden we did in Windsor Terrace. 

BEFORE
The yard had preexisting turf lawn and a stone-walled back and side perimeter bed laid out. 


AFTER
We added Ilex Sky Pencils along the back fence. These keep their color year round and sport nice purple berries in the fall. They will grown to 6-8 ft tall! 
Along the sides, we added some Hydrangeas which will grow huge with big beautiful snowball looking blooms. Can't wait to see how big they are later this year!

Flowering perennials were selected in purples, yellow, and white which will bloom from May through October. 

The wall is a nice feature in the yard and we wanted to accent it by having plants that will creep over the sides.

Look at that yarrow shine!


All of these perennials are loved by pollinators! That purple Agastache blooms so late into the season giving bees food when there is little else around in bloom.

Here's one now!

Our "Before and After"s are usually photos from right after we plant. Plants are just in their infancy when they are first planted. They will grow so much and fill out the yard. I can't wait to go back this season and get some real "After" photos to see how much everything has grown. 

Friday, February 5, 2016

How to Mount a Staghorn Fern

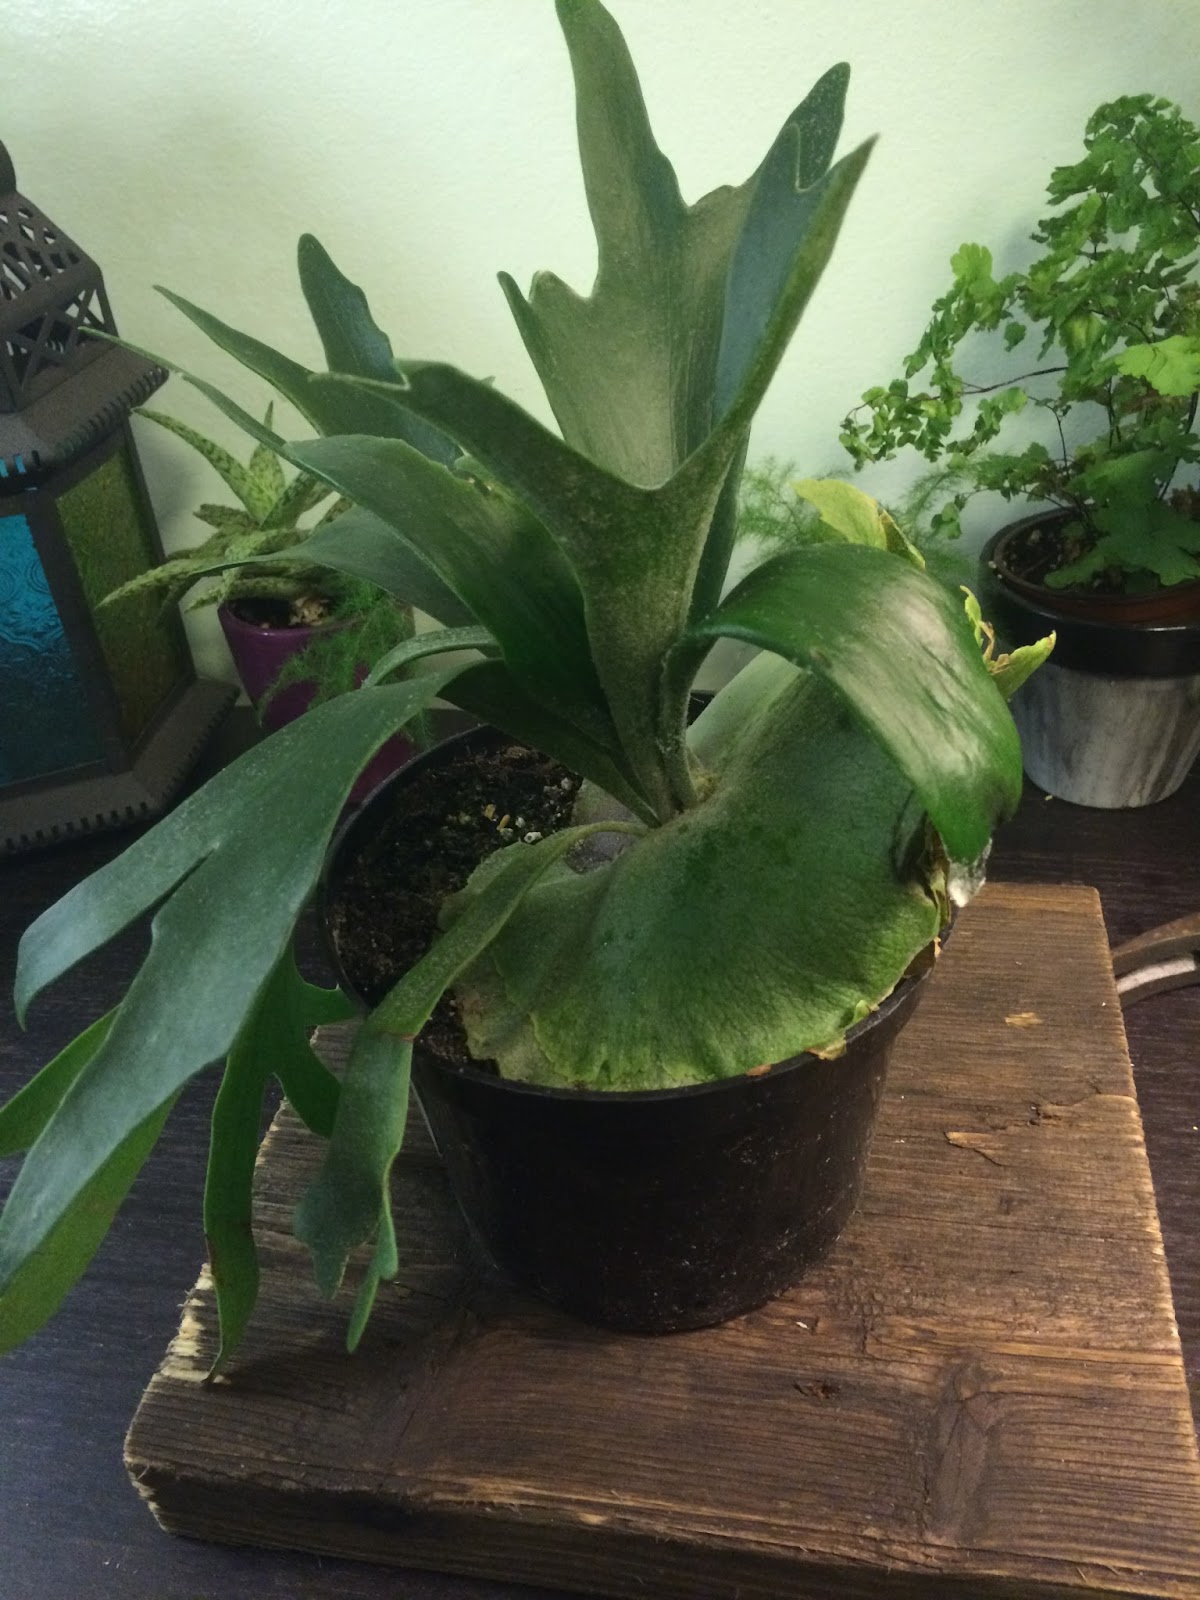
I am lucky enough to be writing this from Mexico and I love jungle plants oh so much, so I thought I'd share a little tutorial on incorporating an awesome tropical plant into your home. Staghorn ferns are members of the Polypodiaceae plant family. They thrive as epiphytes, which are plants that harmlessly grow on another plant, usually a tree, and derive their moisture and nutrients from the air, and rain.

Because they grow on other plants, you must mount your staghorn fern on wood or in a basket. This allows you to hang your staghorn on the wall as a beautiful, growing piece of art. I mounted some for Christmas for my Staghorn NYC teammates and took lots of photos so I could share with all of you!


Step 1: Choose your mounting board. Attach brackets to the back so you can hang your staghorn on the wall when you're done. This will be hard to do at the end without hurting your fern, so do it first!
Step 2: Turn your board over and trace a circle around the base of your pot.

Step 3: Use screws or nails around the circle. You can do more all the way around the circle if you want but I just did four.

Step 4: Gently remove the Staghorn from the soil. Be careful not to break the shield (the brown part at the base). 

Step 5: Put a small pile of soil in the circle you made and cover this with sphagnum moss. This can easily be found at any garden store. It's good to soak the moss in water before you use it. 

Step 6: Place your fern on your pile of moss. Make sure it's facing the direction you want it to grow (check the brackets on the back!). 

Step 7: You should use fishing line to attach the fern but I couldn't find any so I used floral wire that I had(not the best option). Wrap the wire/line around one of the screws. Pull it taught and crisscross around the base of your fern to the other screws.  When it's secure, tie it to the last screw and cut the excess.
Step 8: Viola! You can hang your fern! Hang in a place your fern will get indirect light.

Caring for your fern: Weekly, give the whole thing a good soaking, the board and the plant. Let it dry out before rehanging.  Make sure you don't let the leaves get too dusty because it absorbs through its pores. It enjoys a nice misting once in a while as well. 


Friday, January 29, 2016

Our Favorite NYC Nurseries

We have selected some of our favorite stores for plants and garden-related items in NYC and Brooklyn. This is not a list of all available options, but these are our go-to’s, and they’re retail, not wholesale so you non-industry folks can get all your goodies there too.

In no particular order:

Gowanus Nursery

A well-stocked oasis located way out in the weird nether-scape that is the “Columbia Street Waterfront District” and “Redhook”. A nicely edited selection of annuals, herbs & veggies, perennials, some trees and shrubs and more recently small indoor/tropical. Lot’s of native plants (*boner*) from Glover Perennials (*big boner*). Very knowledgeable staff, beautifully curated.
We always leave Gowanus with Baby Coop at full capacity.
Conveniently located on Metropolitan Avenue in Williamsburg (between Union and Lorimer) it’s close to the BQE for us drivers and the G/L trains for subway-taking folks. Crest has everything. Nice selection of classic standby annuals, lots of herbs, veggies and fruits, perennials (more native Glovers!), trees and shrubs. A good mix of “traditional” and “awesome, native, rarely used” plants, and a big selection of indoor/tropical plants of all sizes. Soils, composts, mulch, plant vitamins, tools, etc. Good prices - they have excellent plant sales throughout the year. A beautiful, sweater-wearing pig named Franklin. And a super helpful, awesome Garden Center Manager named Kristen - she is the best! They have a bathroom, and you can use it.

Sprout Home Brooklyn

Sprout has two super cute neighboring shops located at the very end of Grand St. in Williamsburg. Nice choice of indoor plants of all sizes - especially nice “specimen” plants like rare orchids, carnivorous plants, etc. Nifty ideas for gifts and lovely green interior decorating-y stuff. Excellent selection of planters for indoors and out, plant vitamins and some soils, etc. A smaller selection of outdoor plants, but they usually have some good Glover native perennials and cool, small trees. There are usually a couple of folks with superior plant/garden knowledge working there. Anna is particularly great. A tad on the pricey side, but good quality. They offer cool workshops and classes too!

Kings County Nursery

A mighty big nursery for the city confines. They’re a bit out of the way over in East Flatbush, but the prices are good and the selection nice and traditional. If you need a good o’l echinacea or inkberry, you can probably find it here. They have a great selection of traditional fruit trees. Old school - old men, very nice, good prices.


The Sill is a super cute shop in the Lower East Side. They are great for gifts. They sell locally made planters, easy- care houseplants, and Brooklyn blend soil. The owner Eliza is a brilliant, smart, hot lady. They do bi-monthly workshops and you should check them out!

Friday, January 22, 2016

Snow Outside NYC!

Jon Snow knows everything

Sike! It’s here! And this weekend we get our first big snow storm. They’re calling it a “blizzard”.. but to me a blizzard is like 3ft of snow, not 7-12inches. But sure, we are getting a “blizzard’ and it’s pretty exciting.

New York is beautiful in the snow. 
(You know, at first, before it’s covered in soot, trash and dog poop. But let’s not think about that right now.)

For a little while, our awesome city will be covered in a beautiful blanket of magic. 
We should all try to get out and enjoy it, even if just for a moment. 
I know we don’t have to go outside and we can just watch movies and drink hot toddies all weekend (and that’s awesome!) but that’ll make most of us pretty stir crazy at some point. So, bundle up and walk outside.


Personally, I like the night-time snow walks. 
Maybe because our brains are used to seeing a dark ground and a bright sky and snowy nights are the opposite, so it creates some magical beauty explosion in our brains? Or maybe it's just really beautiful. 
The street lights making the snow all bright oooo so nice.


ooo Brooklyn Botanical Garden in the snow <3


Dog walks! <3 
(Please, please pick up after your dogs, people!)

Getty images
This is a snowball fight from 1938!


Classic snowy Central Park photo <3


Look even this picture I took last winter of a hole in the ground looks pretty covered in snow. 


Everyone should try to get out there and enjoy it while it's fresh and beautiful. But be safe! And bundle up! And probably don't drive and all.. 
We'd love to see your snow photos! Feel free to share in the comments (:

Enjoy the snow storm nyc <3

Friday, January 15, 2016

Irrigation Systems

This week part of the Staghorn team, Colin and I, had the thrilling experience of attending a course at the New York Botanical Gardens about irrigation systems. Irrigation systems are a great idea if you have a landscaped property and you want to keep it looking nice while also conserving water. This is a little guide to some of your options for irrigation.


Underground Sprinkler Systems
This system is best installed before landscaping is done. Parts of the landscape will need to be dug up and replanted if not. Your plants will need to be organized into hydrozones; plants with similar water needs should be grouped together. Each zone will be on it’s own timer and have different sprayer heads that fit to that hydrozone’s needs.

An example of different hydrozone areas
Pros
  • Good for large spaces and lawns
  • Very far spray range
  • Pop up sprayer heads are available so they can be out of sight when not in use
Cons
  • High water usage
  • Sprayer heads are easily broken by foot traffic, vandalism or mowers
  • Water loss from overspray and evapotranspiration
  • Can only be on certain hours or plants can become scorched
  • Needs higher water pressure


Drip Irrigation
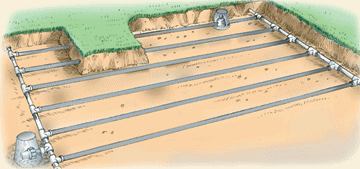
This system involves laying tubing throughout or under the planting area. The tubing has drip holes which allows water to slowly seep out into the ground around the plants. If the tubing is underground, trenches are dug and the piping is laid in a grid, covered and then planted. If it is above ground, the piping can be laid around the planted area and then covered with mulch.

Drip layout under sod
Pros
  • Can be fit into any shape or size area
  • Can be installed underground or above
  • Can be added to old sprinkler systems
    • There are adapters available to turn sprayer heads into dripline connectors
  • Great for water conservation
    • Uses far less water than sprinkler systems
  • Easy to find and fix damaged tubing
  • Works with low water pressure
  • Water goes directly where you need it
    • It is not wasted through evaporation, wind, or surface run off
Cons
  • It may be hard to see that the ground is getting wet
    • Since the piping is underground or under mulch, the surface may look dry even though it’s damp below

Microdrip lines off of larger tubing
MicroDrip Irrigation

Microdrip is great for small gardens, rooftops, balconies, container gardens, or being very specific for a certain plant’s watering needs. It uses smaller tubing than normal drip irrigation. This allows you to plug into the larger drip tubes anywhere along the tube and feed water directly where you want it to go. Emitters are added to the ends which allow you to choose specific water flow to each plant.